

If only I knew this information before embarking on 180 days of walking in the woods; trial and error, networking, and so forth is how I learned–but now I can teach you!
Backpacking is putting one foot in front of the other over and over again; well we do that daily don’t we?! Yes, and no–backpacking isn’t really that complicated; but by no means is easy. Most of us read Bill Bryson’s A Walk in the Woods or Cheryl Strayed’s Wild and think romanticized thoughts “I can do that!” “that would never happen to me” and so forth. But the truth of the matter is: your pack is heavy, blisters happen, bad weather and complications arise no matter what. So what can we do about it?
Avoid some common mistakes, plan accordingly, and avoid at least hopefully (maybe) one problem because of it!
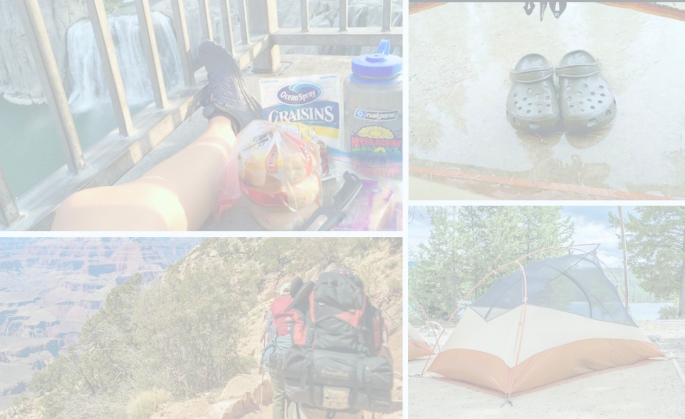
The most common question I get is “what did you eat?!” As if my response would be skinning deer, wild berries, and mushrooms. While this is a valid question; you need to remember to pack the right amount of food. Since I had support at home monitoring my food boxes being mailed to me; it was more than once I had to tell my Mom that if she is going to send this much food, she is going to come carry it for me. And while I am forever grateful for her planning, and support along the way, the reality was; whatever I ate weighed me down.
Individuals who have never backpacked, and especially beginners; worry about not having enough food. Abundance is a trait well-known in our day and age; but that wasn’t so for our ancestors, or even cultures outside of the Western part of the World. We can survive on less, but we don’t want to; and with burning so many calories a day–I wouldn’t recommend it. The average calorie consumption per hiker per day should roughly be 3,000 calories; I know some hikers that had that in one meal alone…HoneyBuns are a staple out there I tell ya!
If you can afford dehydrated meals like Mountain House (Pasta Primavera so good!) Good To-Go (Pad Thai yes please!) etc. then they are the way to go taste, and weight wise! Otherwise, items like Knorr Rice Sides were a staple in my bag at times, as well as Tuna packs and of course the best tasting bars around! Lay out all of your food by day to really visualize what it all looks like and most importantly what it will all weigh!
Have you heard of carrying a crayon in your purse or backpack as an emergency fire starter? Well, if you haven’t–now you have! Another way to make a fire starter is to melt down some candle wax, add a dryer lint sheet cut up (as a wick) in an old egg cardboard carton.
This may be pretty obvious to the seasoned hiker; but Ziplock freezer bags make for great companions, from lining your pot to omit dirty dishes, to waterproofing maps, guides, and journals.
Many times throughout my days on the trail I was told by fellow thru-hikers, people in town, and day hikers alike that I did not look or smell like a thru-hiker (my family begged to differ.) There is a reason for this however; I chose to obtain the extra weight of carrying a packet of baby wipes. Not only for general hygienic reasons, but for cleaning injuries, spills, but yes mostly to wipe the daily sweat off me at the end of the day in my tent before bed. (Trust me, you can clean your skin and feel cleaner but the next morning you still have to put back on those stinky clothes! Don’t feel like carrying wipes, or want to eliminated some shirt stench? Submerse in a nearby creek and lay out on a rock to let the sun dry and disinfect!
I could go on and on about trail like hacks and tips (and will with upcoming entries) but I will end this one with a How To Tape or Wrap an Injured Ankle because let’s face it, I had my share of injuries along the way!
- Position your foot at a 90-degree angle with your calf (such as sitting on the floor)
- Wrap tape or elastic fabric around your calf give or take about 2 inches above the injured ankle
- Loop 2 U-shaped stirrups around your heel and up both sides of the ankle. Wrap another around the calf to finish off
- Start from the injured side; wrap down your ankle, under your arch, and across the top of your foot–repeat this twice
- Make figure 8 paths by wrapping down the side of your ankle, across the top of your foot, across your Achilles and the other side of the ankle finishing back at the arch–repeat this twice and you’re done!
I hope at least one of these tips and tricks was or will be helpful to you in the future adventure you are about to embark on! Drop a comment below to share where you are off to–I’d love to know where my fellow hikers are adventuring to currently.
You need special shoes for hiking — and a bit of a special soul as well.
